LET'S CREATE A STACK
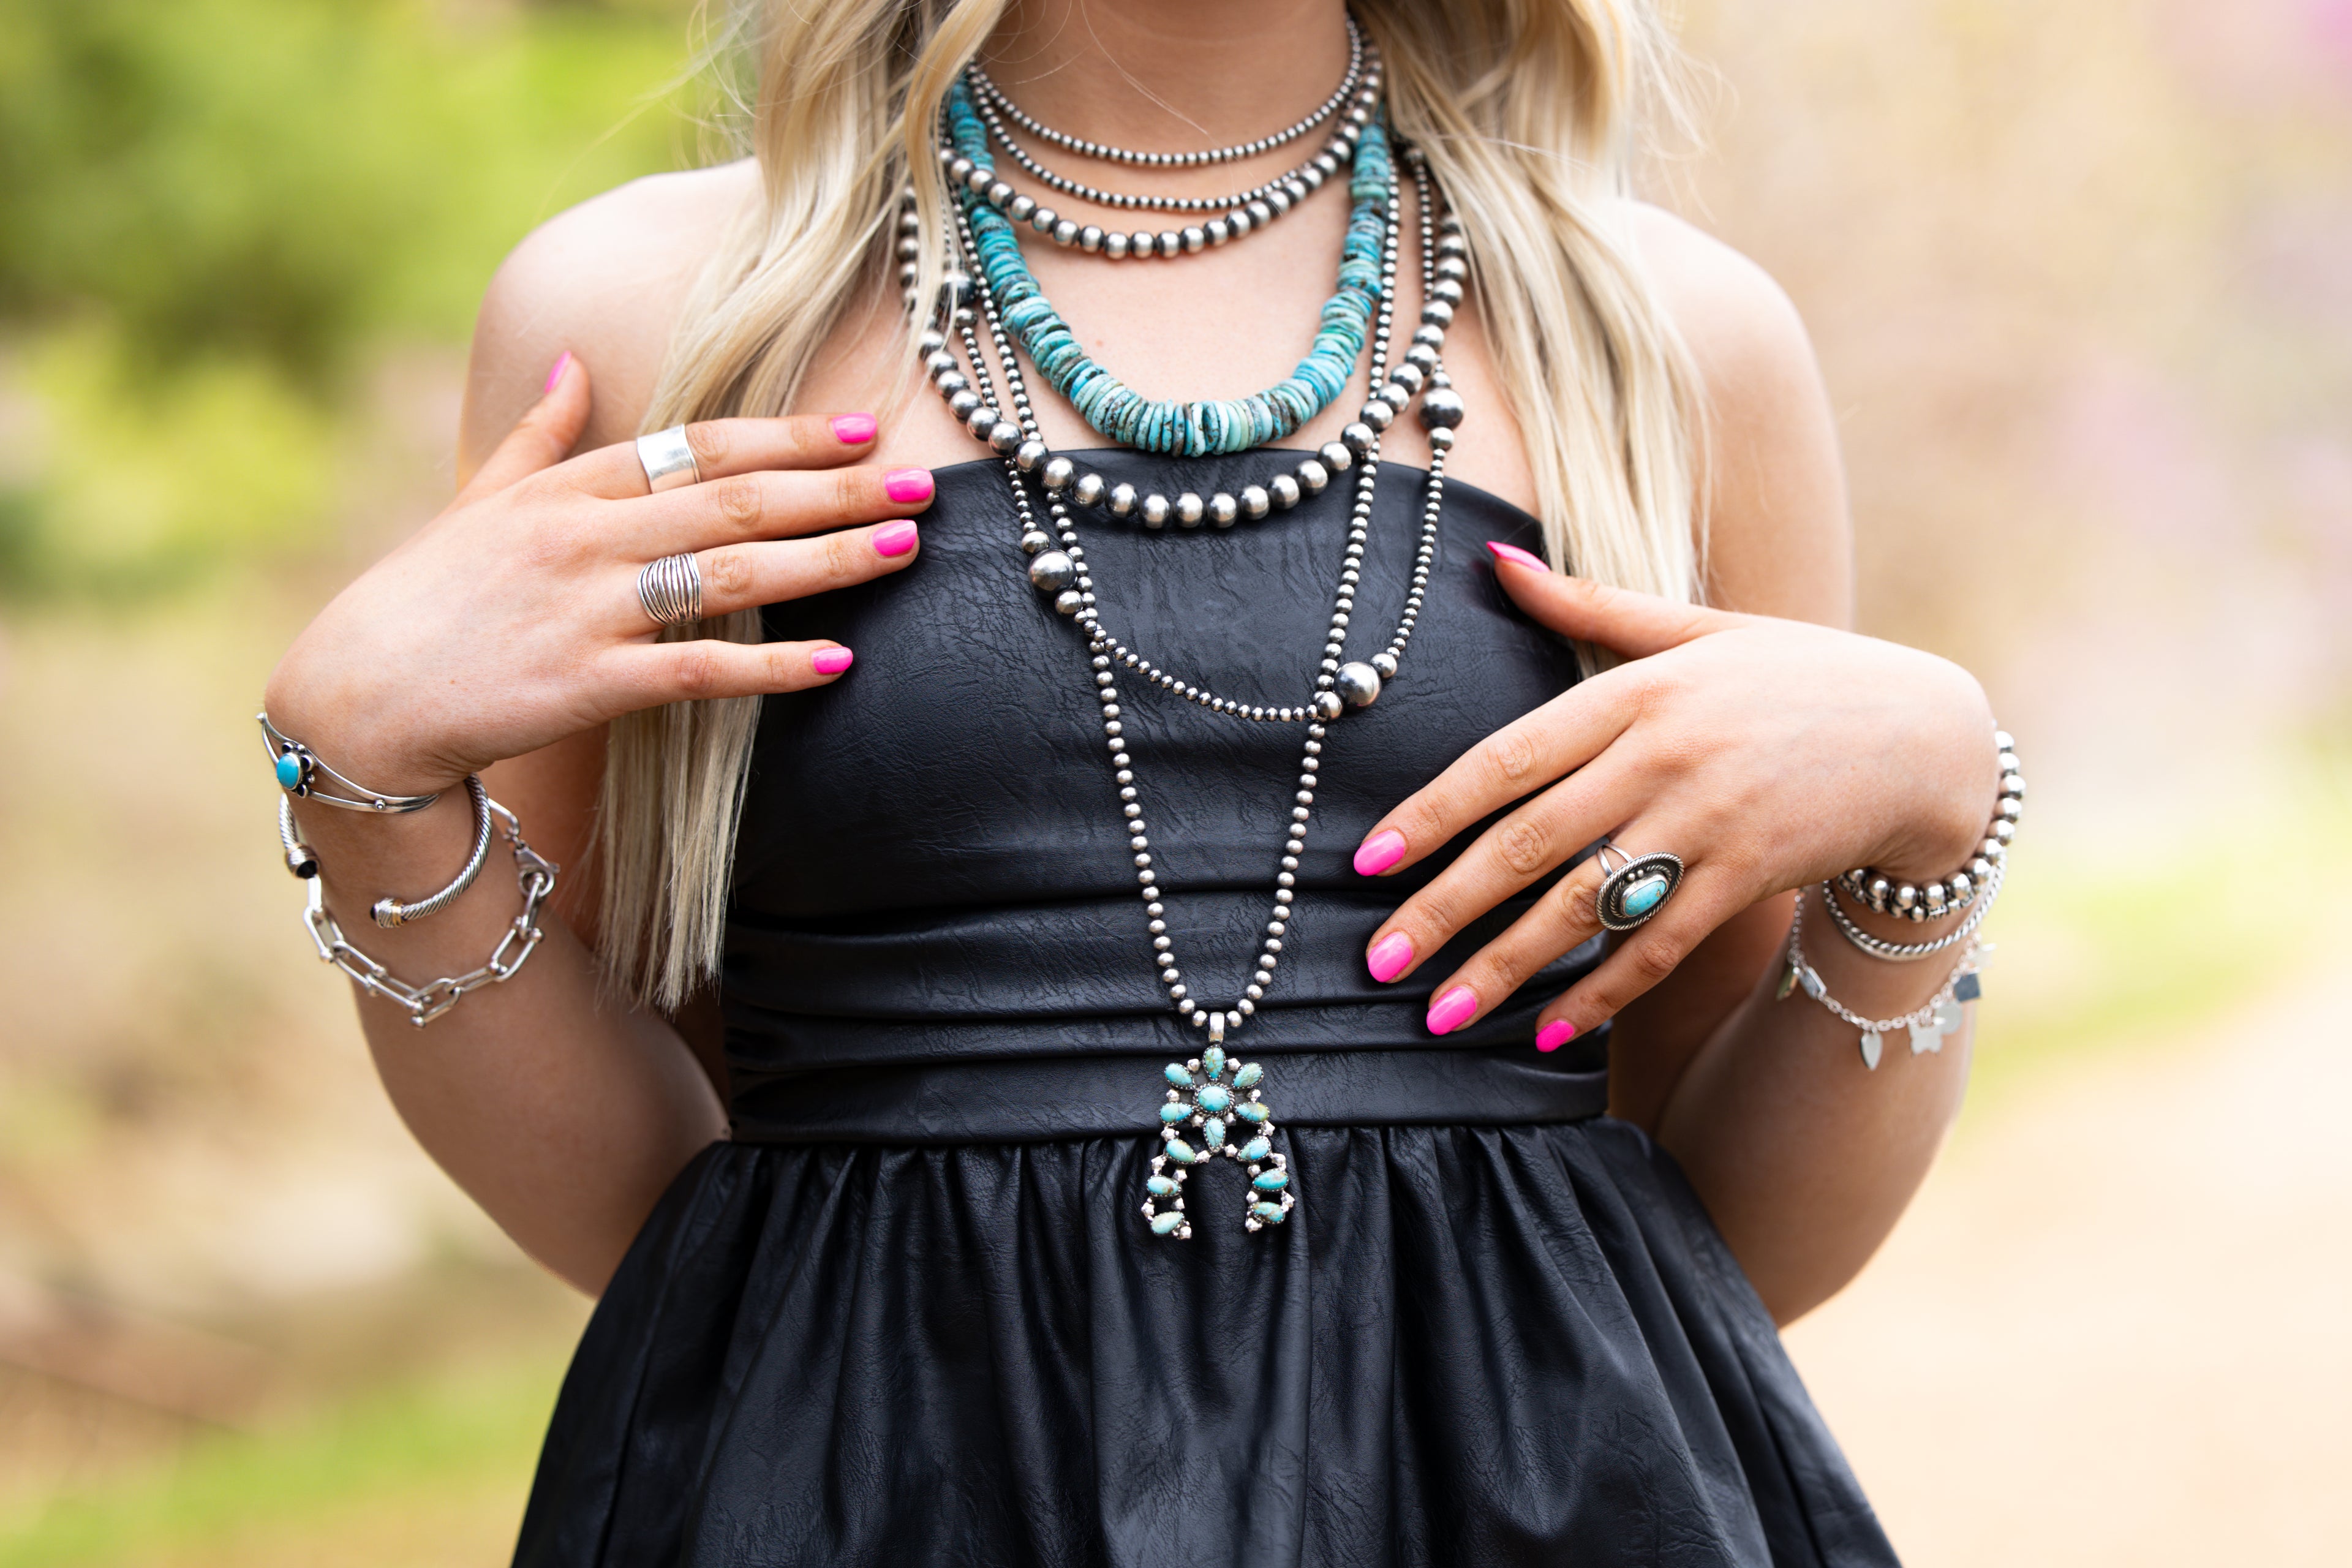
We'll be the first ones to admit that building jewelry stacks is challenging, but it can also be fun! The best news is - there is NO RULES when it comes to stacking jewelry. We're here to share some tips and tricks to help you create some of your favorite stacks.
- START BY FIGURING OUT WHAT TYPE OF LOOK YOU WANT FOR THE DAY. Do you want a short stack? Do you want a long stack? What color combination are you going with for your outfit? The type of stack you are going to style will depend on your outfit and the neckline of your top.
- PICK YOUR STATEMENT PIECE. For a short stack, I like to create a statement by using a necklace with chunkier necklace (the 16" 8mm is my go-to)! From there, I will add smaller necklaces that may have a pop of color or are 3-6mm. This adds variety. For a longer stack, the statement piece is typically a statement turquoise piece or a chunky set of pearls. After starting with this piece, I will layer around it starting with pieces around the neckline and sometimes adding a piece longer than the statement piece. It's important to make sure your spacing is nice - sometimes gaps aren't my favorite. You can achieve good spacing by having different lengths of necklaces.
- HAVE FUN WITH IT. Dress up your stack by adding earrings that match, cuffs, pendents, and your initial bracelets of course!

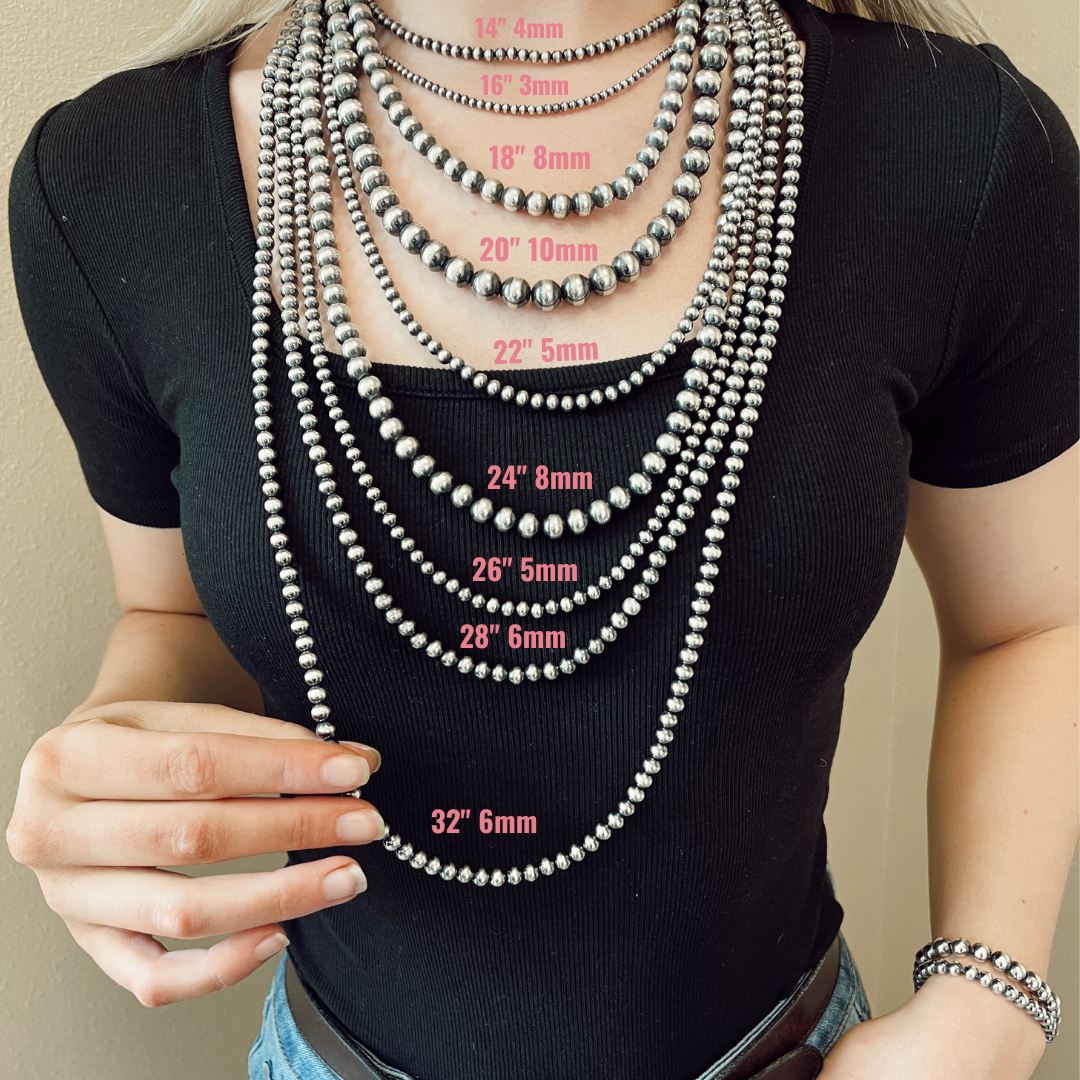
LENGTH GUIDE
Use this as a guide to help figure out where the length of necklaces will hit on you. Please keep in mind that every body is different - bust size and neck size play a role in determining where a necklace will land on you! Each necklace comes with an extender to help with varying lengths to suit your stacks!
Shop Navajo Pearls
-
10mm Pearl Bracelet
Regular price $165.00 USDRegular priceUnit price / per -
10mm Pearls
Regular price From $300.00 USDRegular priceUnit price / per -
12mm Pearls
Regular price From $432.00 USDRegular priceUnit price / per -
14mm Pearls
Regular price From $495.00 USDRegular priceUnit price / per


